A "Lotion Bar" or, a "Butter Bar", is a mix of your favorite butters and oils made harder (higher melting point) by a wax.
The end result is a solid bar that you apply on your skin much like a surfer puts wax on her board
Advantages of a Lotion Bar: no liquid oil mess, no having to melt butter in your hands before applying, super easy to apply, added advantages of Beeswax, fun to make!
Disadvantages of a Lotion Bar: it will melt under high heat making a HUGE mess if you don't have it in a container, if you do, then it will be impossible to get it out of container without melting it again, the beeswax may feel a little heavy on your skin, finding the perfect recipe may be a bit like making a cake without proper measure of ingredients.
Yep, I am still in favor.
Most Butter Bars are for body, but seeing that:
1. I have the perfect oils and butters.
2. Winter skin needs all the help and protective layers it can get.
3. Ocean, waves, tracking, hot showers, wind, sun, working out, Jeep rides also get our faces dry, peeling and in desperate need of a heavier help.
4. I am lazy and love how easy it is to use a butter bar.
5. Beeswax and Candelilla Wax (for vegan recipes, we will talk about it later) have a low comedogenic point, actually helping with skin conditions.
I decided to make a series of recipes for FACIAL BUTTER BARS!
They will be a little softer than the Body Butter Bars, you will need to be a bit more careful with them, also I like to make them small, easier to apply to every spot on your face or just where needed.
FACIAL BUTTER BAR FOR SKIN CONDITIONS

You will need:
Medium sized pan
Very clean glass jar with lid.
Waxed paper cups for molds (for small bars I use the 3 oz. cups they sell for rinsing after brushing your teeth, you can re-use them, be mindful of our environment).
A clean rag or kitchen towel.
Ingredients (for THREE just under 1 oz. bars or TWO 1.25 oz. bars, I like making mine smaller)
Murumuru 1 oz.
Ucuuba 0.25 oz.
Andiroba 0.5 oz.
Pracaxi 0.25 oz.
Beeswax (yellow raw is my favorite) 0.5 oz.
How to Make:Melt wax first, after it is all melted add butters and then after the mix is liquid add oil, check if the oil have hardened the wax, if it does melt for a bit longer, if not take out of the heat.
JAR WILL BE HOT! Dry the jar well so o water gets in your bar and pour melted contents into
your mold. Bars should be hard in no time, if you live in a hot place pop them in the fridge for a few minutes.
You will need a little container to take them around, if you are using them at home, you can keep them in the cup, keep one by the bed, one in the bathroom and one in the fridge.
IF YOU LIVE IN A SUPER HOT PLACE OR SUPER COLD PLACE RE-THINK WAX QUANTITY!
DO NOT LET IT MELT IN YOUR CAR OR PURSE, BIG MESS!

Next recipe will be FACIAL BUTTER BAR FOR HYPERPIGMENTATION.
Ready to impress your friends with made with lots of love and goodness gifts? Stuff they will never find in stores?
Gifts that will made their skin gorgeous with ingredients that help protect the Amazon and help buy "Natal" gifts for rainforest kids?
Here is the recipe for a great one!
Butter or Lotion Bars are a great way of carrying your favorite butter around and super easy to apply.
They are basically your favorite butters and oils hardened by waxes. Unrefined Beeswax is my favorite but if you want a vegan bar you can also use Candelilla wax *, in which case you need to tweak the recipe a little, since this wax is a bit harder than Beeswax.

YOU WILL NEED:

TWO CLEAN and DRY glass jars (we are going to use a makeshift double boiler) with lids.
9 oz. cups, I like the waxed paper best but the styrofoam will work.
Wax paper.

DARK BAR:
2 oz. beeswax (cut in smaller pieces to facilitate melting)
2 oz. Tucuma Butter
2 oz. Buriti Butter
0.5 oz. Buriti Oil
0.5 oz Andiroba Oil
Essential oil (you can skip the essential oils as the natural scent of the butters is nice and fades quickly, you can also use the same oil for both sides or different oils, which is fun, make sure you choose oils that go well together).

LIGHT BAR:
2 oz. beeswax (cut in smaller pieces to facilitate melting)
2 oz. Cupuacu Butter
2 oz. Murumuru Butter
0.5 oz. Pracaxi Oil
0.5 oz Brazil Nut Oil
Essential oil (you can skip the essential oils as the natural scent of the butters is nice and fades quickly, you can also use the same oil for both sides or different oils, which is fun, make sure you choose oils that go well together).
Making them is super easy!
Put all your ingredients for the LIGHT BAR (minus the essential oil) in a glass jar,
Pour about 4 inches of water into a medium sized saucepan and place on a burner over medium heat. Place the glass jar into the pan with the water. Make sure that no water gets in it, as this WILL ruin the lotion bars.
Let the water get to a simmer and swirl the the jar 4-5 minutes until all ingredients are melted, add your essential oil and swirl the jar again. Pour immediately in the cups, pour 1/2" for smaller bars to 3/4" for larger lotion bars.
Put the cups in the fridge on a flat surface.
Start melting the ingredients for the DARK BAR (again, add the essential oils when all the rest is melted) make sure to use a different jar. Repeat the process.
While you are melting it, take the cups from the fridge, it must be very solid by now, these bars solidify fast.
Pour 1/2" to 3/4"" on top of the light bar and put immediately in fridge. Make sure you have enough mix for every cup.
After 30 minutes you are ready to take them out of the molds, turn the cups upside down on wax paper. They should look like this:

There are many ways to gift wrap these bars, I use wax paper first, cut it in squares and wrap the bars.
Then you can use tin cans, a plain kraft paper around it, little muslin bags, hand made labels. Get creative and make the perfect complement for your 100% natural, 100% active ingredients, sustainable and fair traded, hand poured lotion bar!
EXAMPLES:


Good luck and I hope you have fun making these!
* wax derived from the leaves of the small Candelilla shrub native to northern Mexico and the southwestern United States
You can find the butters and oils here:
I bought my wax on this shop on ETSY, quality was good, fas shipping they have their own bees.
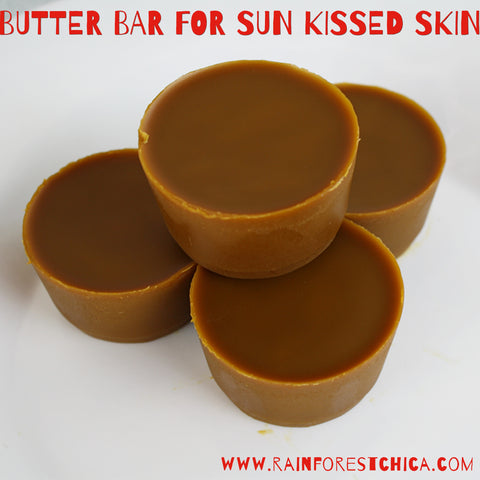
This super easy to make lotion bar is perfect for after sun care, it will make your skin glow and your tan last a LOT longer. As a Brazilian woman who loves the sun and tans easily but still has sensitive skin I really need something to make sure that my beautiful brown skin will not dry, flake or peel.
Just melt all these ingredients on a double boiler or a makeshift one - just use a VERY clean and dry glass jar and a pot with water. After everything is well melted pour into a mold, put in the fridge and voila!
I like unrefined beeswax much better but I only had the white one handy, for a vegan version you can use candelilla wax, but use 2/3 to 1/2 of the quantity as it is a harder wax.

1 oz. Beeswax
1.5 oz. Bacuri Butter
0.5 oz. Ucuuba Butter
0.25 oz. Buriti Oil
You can add essential oils but keep in mind any citrus oil (tangerine, grapefruit, orange, lemon, lime) is photosensitizing, they may cause your skin to stain or burn in the sun. If adding essential oils, make sure you do after the ingredients are all dissolved and twirl the jar a few times.

I use the 9 oz. paper cups as mold and the 4 oz. tin can to take my butter around.

The result bar is hard enough to be taken out with you, but do not leave it under direct sunlight.

It also adds a subtle tinted effect to your skin (right leg), it can also stain fabrics, make sure your clothing is dark or the butter is totally absorbed.
Thank you and contact me at chrystinerocha@gmail.com for any questions.